- Home
- UFAI in the News
- UFAI Medical Publications
- Treating Achilles Tendon Ruptures
Treating Achilles Tendon Ruptures
Approximately 20 years ago, I saw my first Achilles tendon rupture with bated breath. I thought the surgery was amazing and being able to tie a tendon back together that looked like strands of spaghetti was amazing. After the surgery, the patient wore an above-the-knee cast and the surgery was considered a full success.
However, I had a chance to follow the patient over the next year and found she had a miserable time with recovery. She had a terrible time with the long leg cast and was non-weightbearing for over two months. Accordingly, she had a great deal of muscle atrophy. After she was out of the cast, it took her six months to walk normally and over a year to get back to full activity. With all of that, she was still weaker on her surgical Achilles and never quite recovered.
Twenty years later, the treatment options have dramatically improved for Achilles tendon ruptures. After undergoing an anterior cruciate ligament (ACL) reconstruction on my knee, I noticed the difference among several doctors with the recovery process and surgical options. Some use one drill hole, some use two drill holes and some use three drill holes. Some use a brace and some do not. Overall, all the knee specialists suggested rapid physical therapy but only a few that I knew had thought out the importance of a rapid recovery process under controlled settings. By having a repair of the ACL with rigid internal fixation, I was able to begin biking the day of surgery without a brace, making my recovery much faster.
This has changed my attitude towards Achilles rupture care and I would like to present what I believe is a relatively safe and effective Achilles repair and recovery process.
Prior to surgery, it is important to consider the type of tear, the severity of the tear and the length of time since the tear occurred. In cases of longstanding tear, a flexor hallucis longus tendon transfer to the calcaneus may be necessary and this will require a different recovery process.
With this in mind, let us consider an acute Achilles tear that one sees right away and can care for rapidly. In such cases, the physician can use ultrasound or magnetic resonance imaging (MRI) to check the level of tear and the amount of proximal Achilles retraction. I prefer using diagnostic ultrasound as it allows a dynamic Achilles test. Dorsiflex and plantarflex the ankle, and check the amount of gapping about the Achilles tear region. Podiatrists can also check the proximity of the Achilles tendon ends under ultrasound guidance.
Key Considerations For Pre-Op Planning
After checking the Achilles, plan the surgery. I suggest a short period of rest and icing for two to three days to decrease edema. It is not often necessary to wait for swelling to decrease in Achilles tendon ruptures as the region does not seem to swell severely.
On the day of surgery, it is essential to plan for the worst case scenario. It is not uncommon to have a low energy Achilles tear, which has severely shredded ends that are difficult to put back together. In such cases, it is difficult to get a very strong repair with suture only. I prefer to augment the Achilles repair with a graft material such as GraftJacket (Wright Medical). The addition of an external graft material facilitates wrapping of the tendon in order to allow the shredded strands a better medium for healing. This approach also leads to less scar formation.
Step-By-Step Surgical Pearls
Plan the surgery with the smallest incision that will allow adequate repair. Centering a 5- to 6-cm incision over the region of tear is adequate in most acute tears. The surgeon should limit deep dissection and tag the peritenon for later repair.
Free the Achilles on the proximal and distal ends, and freshen the ends of the tear region. I prefer to use a Krachow stitch for my repair and like to use a fairly large suture material such as #2 Fiberwire (Arthrex). Pass the suture in a locking [6]fashion up one half of the tendon and down the center with two separate strands forming four strands of tendon on either side of the repair. Then bring together the repair ends and sew together the strands on either side of the tendon. It is important to reduce the length of the tendon to an anatomic level prior to suturing of the tendon ends as the Krachow suture technique is an end-to-end repair and requires proper length of the tendon.
After suturing together the tendon, perform stressing of the tendon with gentle range of motion to see if any separation occurs. If there is any gapping or tearing, augment the tendon with a 2-0 suture at the edges of the tendon. If there is significant weakness, utilize a graft augmentation to wrap the tendon. Close the wound with the usual technique and use a strong skin suture to allow for early range of motion.
Can The Use Of A Postoperative Boot Have An Impact?
When it comes to patients with severe tears, one may use a cast for two to three weeks but the ideal approach is the use of a postoperative boot. The boot should either have a plantarflexion locking hinge or an internal heel lift. I prefer to use four to six ¼-inch cork lifts that extend to the arch at an angle with a distal bevel in a normal boot. This allows me to keep the cost of the boot down and I can adjust the amount of lift as the patient moves along the postoperative course. I can also increase or decrease the heel lift easily.
Place the patient on strict non-weightbearing for the first five days in the boot and follow up for a wound check. I will not start any form of range of motion until the wound is fairly well healed. After five days, check the wound and if it looks stable, allow the patient to begin five minutes of passive range of motion twice a day. This should be under the supervision of a friend or family member, who needs to be present at the first postoperative meeting for instructions.
Teach the patient to hold the entire foot stable on the sole and how to hold the knee bent and stable. Explain to the patient that he or she can use a hand on the foot to dorsiflex and plantarflex the ankle as much as he or she can tolerate without pain. This is usually about 10 degrees total before the patient reaches pain tolerance. Let the patient know that it is important to keep the knee flexed in order to decrease the pull of the gastrocnemius muscle.
The true physical therapy begins at the second postoperative visit at day 19. I have found that two weeks is not quite enough for the wound to be strong so I have extended my time to 19 days.
Remove the sutures and see if the wound is fully healed and stable. If this is the case, remove at least one to two of the ¼-inch lifts from the heel of the boot. Allow the patient to perform partial weightbearing (approximately 20 percent) in the boot. Most patients state that they feel better range of motion at this point due to the limited passive range of motion. They also feel very comfortable with the removal of a half-inch of lift.
A Protocol For Post-Op Physical Therapy
Have the patient begin physical therapy three times a week with instructions or a written protocol. In addition to the following protocol, patients should perform home physical therapy for 10 minutes a day at home with bent knee passive dorsiflexion and straight knee active plantarflexion with no pain.
Week one (21 days after surgery): Begin passive dorsiflexion range of motion and active plantarflexion with no resistance.
Week two (28 days after surgery): Patients perform active plantarflexion with slight resistance and passive dorsiflexion with mild stretch to limited pain. Make sure the patient is in tune with the pain level during motion. Patients may use an exercise bike with no resistance for five to 10 minutes in a shoe with a half-inch heel lift and slow peddle.
Week three (35 days after surgery): Have the patient begin active dorsal and plantar range of motion. Patients may use a low weight (3 to 5 pound) resistance band, exercising in three sets of eight. Patients may utilize an exercise bike at slow speed for 20 minutes. Remove the ¼-inch lift and allow 50 percent weightbearing in the boot.
Week four and five (42 to 56 days after surgery): Patients may begin active dorsal and plantar range of motion while seated. They may also initiate standing balance exercise and isometric calf and Achilles tightening. Patients use resistance of 5 pounds with a resistance band with three sets of 30. They may use an exercise bike at medium speed and with no resistance for 30 minutes. Remove all lifts to ¼ inch that remain and allow 100 percent weightbearing.
Week six to eight (56 to 70 days): Patients may employ full range of motion and active strengthening with resistance and standing heel lifts with hand assist. The patient may begin unlimited biking for strength. Remove the boot and have the patient begin wearing shoes with half-inch lift. Remove the ¼-inch heel lift from the shoe when the patient is comfortable.
Week eight to 12: At this point, the patient can increase strength training and sport-specific exercise. Emphasize to the patient that he or she should avoid cutting or jumping for at least 12 weeks.
I usually like to release patients at 12 weeks to begin regular activity at limited intervals and limited time. Slow and steady is the general idea. I will usually check the tendon under ultrasound guidance to make sure it is gliding well and has healed well prior to progressing the patient.
Closing Notes
Remember, the above protocol is not essential to follow exactly but the idea is to limit weakening of the tendon and keep the muscle strong during recovery. This will allow a rapid return to activity and prevent long-term or permanent weakness.
Dr. Baravarian is an Assistant Clinical Professor at the UCLA School of Medicine. He is the Chief of Foot and Ankle Surgery at the Santa Monica UCLA Medical Center and Orthopedic Hospital, and is the Director of the University Foot and Ankle Institute in Los Angeles.
 I was treated by Dr. Franson last summer after waking up to a debilitating ankle pain. I had been to several doctors in the we...Ecole L.
 Great experience. Great communication. Great direction for my care. Very happy I chose to go with this particular doctor and o...Christopher R.
- Great service and care. Highly recommend Dr. Franson.David B.
 Staff very friendly. Validate parking. Dr Feldman is the bestSharon P.
- If you have to go see a Doctor than this is a great experience.Frank M.
- My doctor was great. Really greatRudolph B.
 I've been to a few podiatrists in the area, and this is by far the best experience I've had. They very thorough, good care, goo...Seth H.
- Good.David E.
- Your Santa Barbara office and Dr. Johnson always give me excellent care!Jayne A.
- Dr. Gina Nalbadian was amazing!! I came in with an emergency foot situation and she had wonderful bedside manner and resolved m...Danielle C.
- I was frustrated that after 3 weeks I still hadn’t heard back about my PT referral status. And I did sit in a room for over 30 ...Sarah C.
- I’m very pleased with Dr. Kelman.Alan S.
-
 Listen Now
If the Shoe Fits, Wear it… Especially for Kids Shoes!
Read More
Listen Now
If the Shoe Fits, Wear it… Especially for Kids Shoes!
Read More
-
 StimRouter: A Revolutionary Approach to Targeted Pain Relief
Read More
StimRouter: A Revolutionary Approach to Targeted Pain Relief
Read More
-
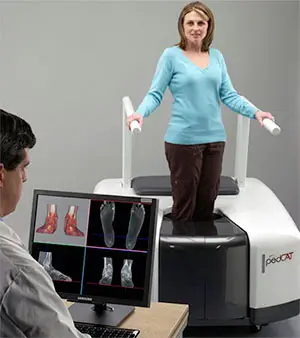 State-of-the-Art CT Scanning, Now in Our Office
Read More
State-of-the-Art CT Scanning, Now in Our Office
Read More
-
 Listen Now
An Inside Look at Shockwave Therapy for Heel Pain, now available in Valencia, CA
Read More
Listen Now
An Inside Look at Shockwave Therapy for Heel Pain, now available in Valencia, CA
Read More
-
 Listen Now
15 Summer Foot Care Tips to Put Your Best Feet Forward
Read More
Listen Now
15 Summer Foot Care Tips to Put Your Best Feet Forward
Read More
-
 Listen Now
Revolutionizing Extremity Imaging: UFAI's Open MRI for the Foot and Ankle
Read More
Listen Now
Revolutionizing Extremity Imaging: UFAI's Open MRI for the Foot and Ankle
Read More
-
 Listen Now
The Power of Pediatric Flexible Flatfoot Procedures
Read More
Listen Now
The Power of Pediatric Flexible Flatfoot Procedures
Read More
-
 Listen Now
Is Barefoot Running Better? Or are you Running Toward Injury?
Read More
Listen Now
Is Barefoot Running Better? Or are you Running Toward Injury?
Read More
-
 Listen Now
The Link Between Foot Health and Posture
Read More
Listen Now
The Link Between Foot Health and Posture
Read More
-
 Listen Now
Why Are My Feet Different Sizes? It's More Common Than You Think
Read More
Listen Now
Why Are My Feet Different Sizes? It's More Common Than You Think
Read More
-
 Listen Now
9 Running Tips from Sports Medicine Experts
Read More
Listen Now
9 Running Tips from Sports Medicine Experts
Read More
-
 Listen Now
Revealing the Secrets of Men's and Women's Shoe Sizes: Why Are They Different?
Read More
Listen Now
Revealing the Secrets of Men's and Women's Shoe Sizes: Why Are They Different?
Read More
-
 Listen Now
Common Foot Problems In Aging Feet: What To Watch Out For
Read More
Listen Now
Common Foot Problems In Aging Feet: What To Watch Out For
Read More
-
 Listen Now
How to Choose Running Shoes: 6 Essential Steps
Read More
Listen Now
How to Choose Running Shoes: 6 Essential Steps
Read More
-
 Listen Now
Custom Orthotics vs. Over-the-Counter Inserts: Which Are Best for Your Feet?
Read More
Listen Now
Custom Orthotics vs. Over-the-Counter Inserts: Which Are Best for Your Feet?
Read More


